DIY Accent Wall
December 6, 2020
Zach and I moved into our house a little over 3 years ago and have always wanted to do an accent wall somewhere in our house to add some more character! A few weeks ago, his brother and him took on the project and we are SO happy with how it turned out! My room feels like a trendy hotel, and I’m obsessed! Below, is a blog post written by Zach detailing out how YOU can do this too!
Xx, Liz
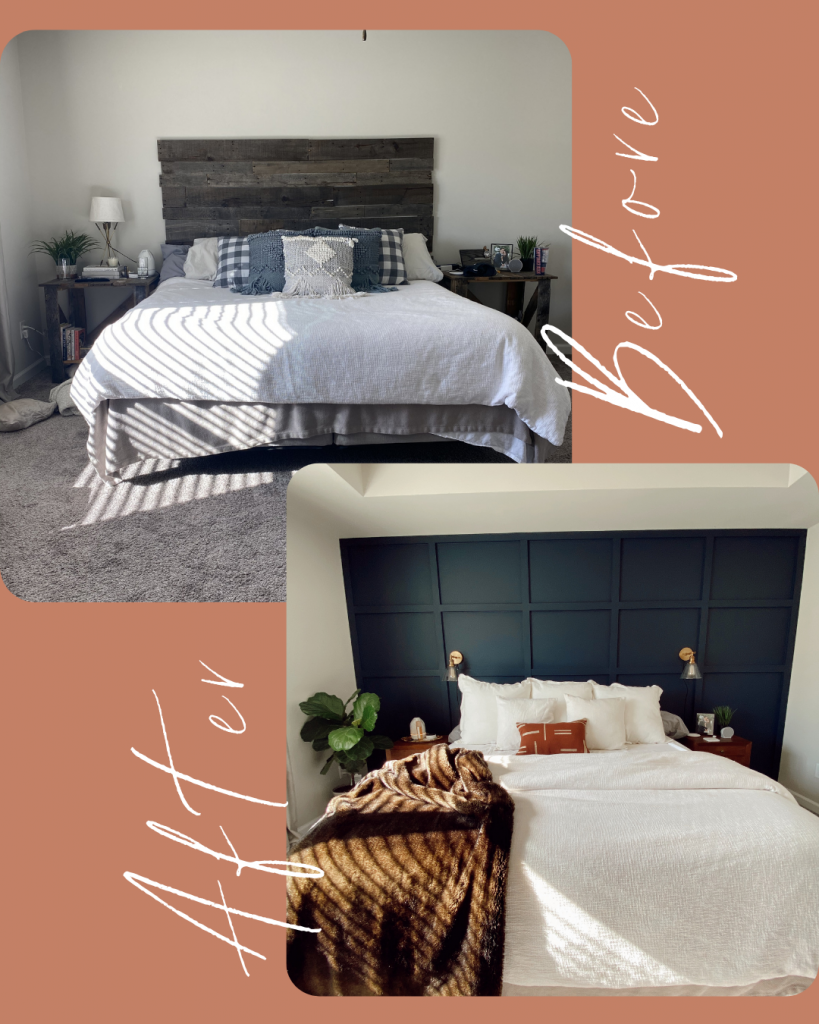

HOW TO: DIY Accent Wall – Board and Batten
Before you even touch the saw, nails, paint, etc. we highly suggest you do these things first.
- Get a friend to help – If you are looking up how-to’s for this project, this is likely the first time you have done a DIY accent wall. In that case, a helping hand (spouse, buddy, neighbor, significant other, reluctant brother) will go a long way to speed things up and make the project fun!
- Make sure you have all the supplies before doing anything else. The space for your project and your specific style will impact what materials and tools you need to use. Here is an exhaustive list of everything we used:
- Trim – we chose an unfinished, squared wood trim (Common: 1 in. x 3 in. x 8 ft.; Actual: .719 in. x 2.5 in. x 96 in.). Your preferences may be different, so we suggest taking a stroll through the lumber section at Home Depot or Lowes to find what you like.
- Circular Saw (a miter saw will be best in most cases for the small cross cuts you need to do for molding)
- Screw Drivers (for removing and replacing outlet coverings)
- Tape Measure
- Level
- Spackle
- Putty Knife
- Pencil
- Sandpaper (and sander if you want to make the job easier)
- Liquid nails – this was recommended by just about every other DIY project we researched
- Brad Nails
- Brad Nailer – This was something we didn’t use, and in hindsight, probably should have. Our boards weren’t sitting flush against the wall, and the liquid nails + hand nailing wasn’t cutting it. We wound up having to use a drill and screws to secure the boards, which obviously created more work for us on the back end during the spackle and sanding process.
- Caulk – this was integral to giving the project a “professional” look
- Caulk Gun
- Paint – spend time ensuring you know exactly what color you are going for. Accent walls draw attention as soon as you enter the space, so you don’t want to choose something that you wind up regretting over time.
- Paint Brushes
- Paint Roller
- Paint Tray
- Old blankets or large towels to protect the floor from paint
- Painters tape (or a good enough paint brush that allows you to trim out the wall by hand)
TIME TO GET STARTED
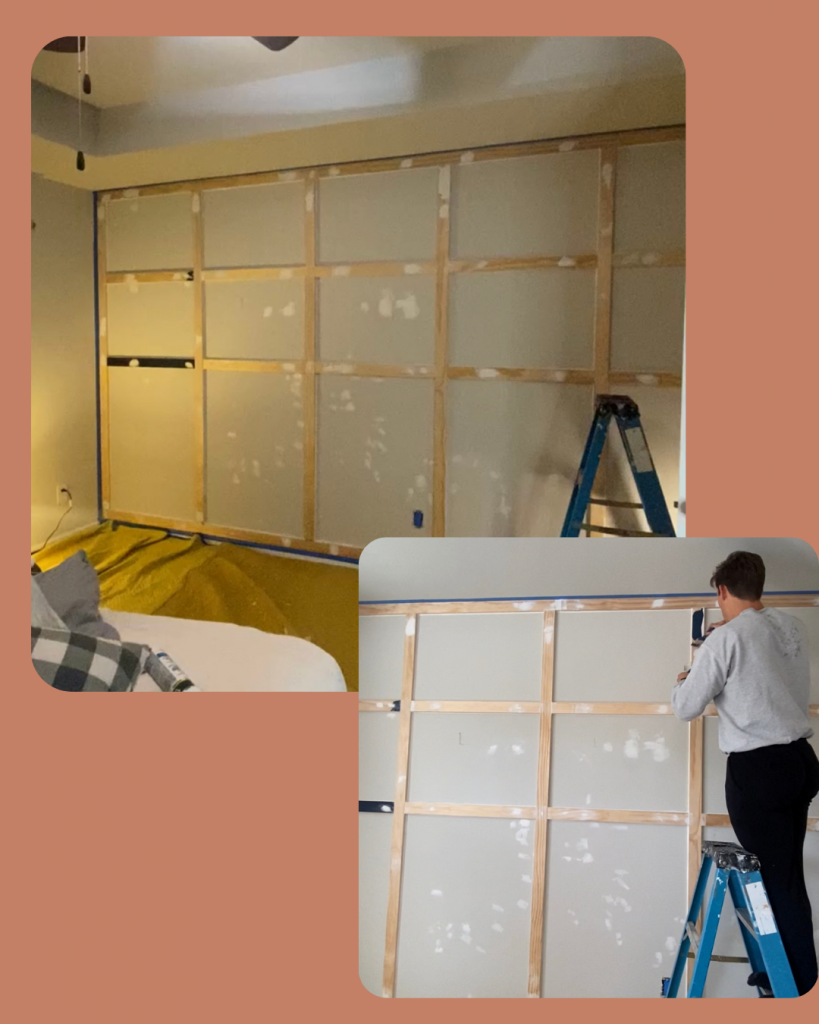
- First thing’s first – measure (if you already know your measurements and how much material you need, you can skip #1).
- The right measurements are paramount! You’ll first need to measure the height and width of the wall for framing. Our wall was 165” wide by 93” tall, so we knew we needed to start by framing the wall with 516” of trim (Height of wall times 2 plus width of wall times 2).
- The right measurements are paramount! You’ll first need to measure the height and width of the wall for framing. Our wall was 165” wide by 93” tall, so we knew we needed to start by framing the wall with 516” of trim (Height of wall times 2 plus width of wall times 2).
*Keep in mind you’ll also need to account for the width of the boards in your final measurements – our boards were 2.5” wide, so we subtracted 5” off our final measurement s for the horizontal frame to fit with the vertical frame.
- The next measurements were the horizontal and vertical interior trim. We decided on 4 vertical boards, and two rows of horizontal boards. This meant we needed an additional 352” for the vertical boards (88” times 4), and 300” for the horizontal boards (10 boards times 30” each). This gave us a grand total of 1,168”, or about 98’ of trim.
- Once we knew the measurements and had our materials/tools, it was time to start cutting and nailing the boards. We started by framing the wall, then inserted the vertical and horizontal interior trim. Keep in mind that it’s very important to keep everything level as you fasten the vertical and horizontal trim.
- Next was the spackling. We used a putty knife and spackle to cover up imperfections on the boards and fix any nail marks (we also had screws in the boards that required extra attention – so we suggest avoiding screws if possible).
*You can also use this as an opportunity to cover up any damages on the wall if they exist, as it will all be painted in the final step.
- Then we used caulk to finish off the trim wherever it touched the wall. This gave the trim and sheetrock transition a finished look, and made all the difference once it was sanded and painted
- Once the spackle and caulk had dried, we sanded. And sanded. And sanded. Don’t underestimate the importance of this step. There were areas we should have paid more attention to, and it shows even after a couple coats of paint.
- Tape off the wall. Take your time getting as close as possible to the trim while you are taping. This will ensure you don’t get paint in places you don’t want. Simple, but necessary.
- Start painting! We started by brush painting the boards and corners that couldn’t be reached with the roller, then used the roller for the sheetrock between the trim. We did 2 coats of paint. The wall was about 110 sq. ft. – we bought a gallon and had plenty left (better to have it and not need it than need it and not have it).
- That’s a wrap! Now that everything is finished, you can set up the room around your new accent wall! This is a great way to add character to a room with your own design preferences so it’s a space that represents your style and feels like home.


PLEASE COMMENT BELOW